In this tutorial we will show how to live stream from GoPro Hero cameras to Facebook Live using the Camera Remote app.
Prerequisites
The following tools are required:
- Camera Remote app (download here) or the Camera Suite app (download here).
- ffmpeg (download for free here (Windows) and here (macOS)).
- Two network adapters (one for the camera, one for internet access).
- A Facebook account.
Setting up Facebook Live
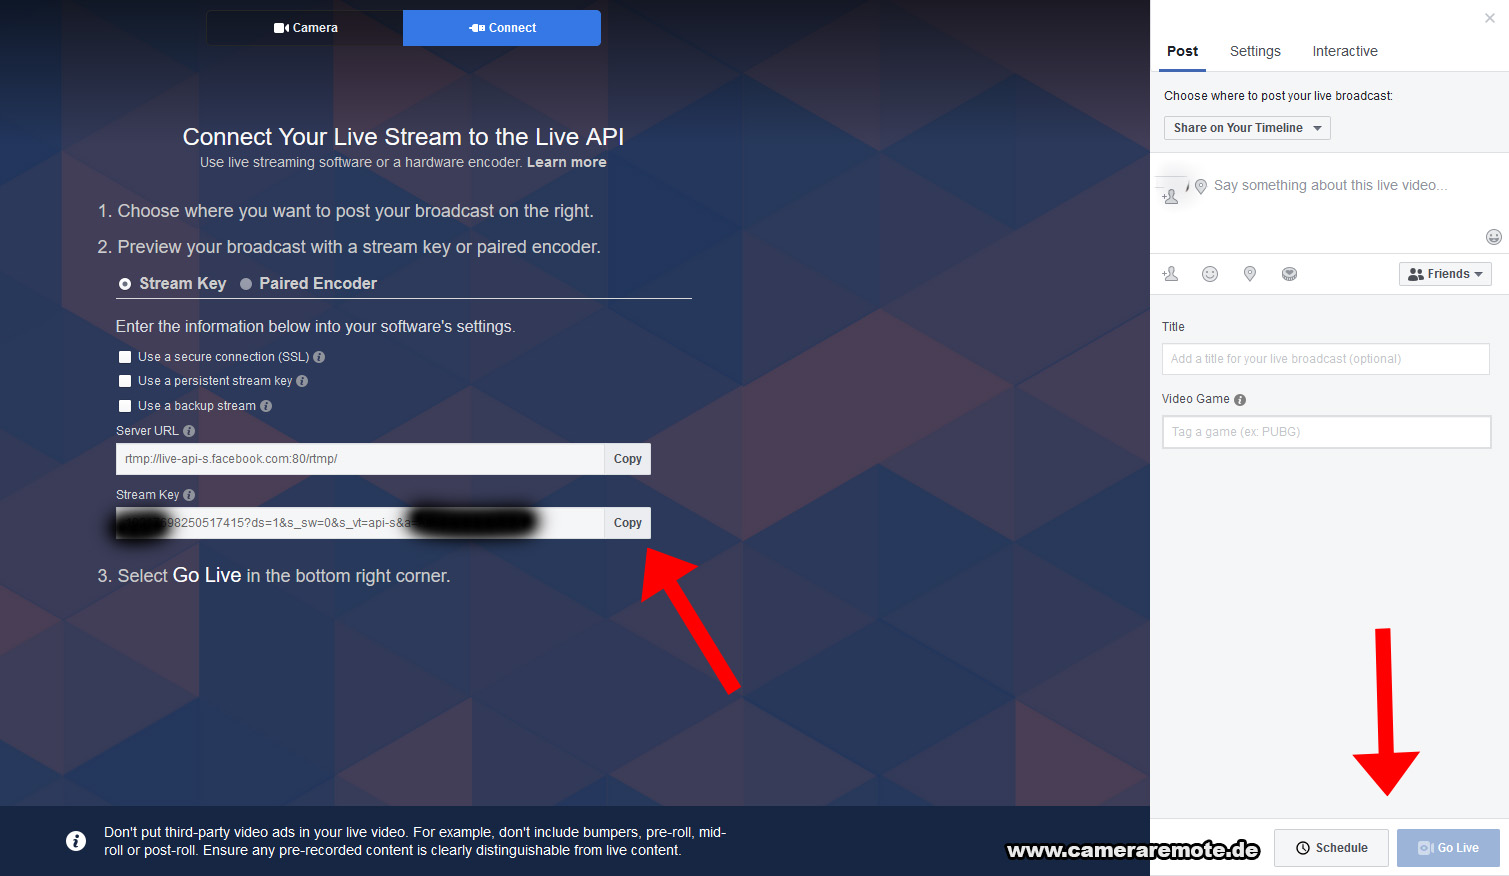
First go to https://www.facebook.com/live/create and select Create Live Stream. Then note down the Server URL and Stream Key:
Settings up ffmpeg
ffmpeg is a free command line tool which converts media streams. In this step we will setup ffmpeg which you can download here. On the ffmpeg binary download site select your architecture (Windows 32-bit, Windows 64-bit, or macOS 64-bit) and “Static” build. Then press the download button. Extract the downloaded file and copy the file “ffmpeg” (macOS) or “ffmpeg.exe” (Windows) from the “bin” directory to your desktop. Then open a terminal (macOS) or command prompt (Windows) and type:
cd Desktop
Then enter the following command:
ffmpeg -f mpegts -fflags nobuffer -i "udp://10.5.5.101:8554" -f flv -acodec aac "rtmp://live-api-s.facebook.com:80/rtmp/<YOUR FACEBOOK STREAM KEY>
Replace “<YOUR FACEBOOK STREAM KEY>” with the Stream Key from the Facebook Live website as shown in the section above.
Starting the live stream
Now open the Camera Remote or Camera Suite app and connect to your GoPro camera. Then open and start the streaming server. Then press the “Go Live” button on the Facebook website as shown in the screenshot above.
You should now see the live stream in the Facebook window and in the Facebook timeline (or wherever you selected to show the stream). Note that it can take some seconds until you see the stream.
If you do not hear audio then make sure that the GoPro camera is in video mode. The camera does not capture audio in the photo modes!