In this tutorial we will show step-by-step how to connect to a camera Wifi network under Android, iOS, macOS, and Windows.
Android (Google)
First, swipe down the top toolbar from. Then select the Wifi icon. Depending on the Android version and vendor there are different ways to open the Wifi settings. Try one of the following:
- Press the text below the Wifi icon (works on Samsung devices).
- Press and hold the Wifi icon (works on vanilla Android, e.g. Google Pixel, Nokia 7 Plus).
In the Android Wifi settings select the network you want to connect to (GP24509022 in this example):

Then enter the Wifi password and press CONNECT. You are now connected to the Wifi network.

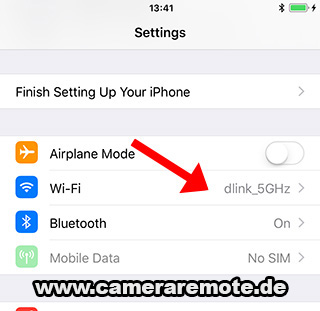
Apple iOS
Go to the iOS system settings and press on the “Wi-Fi” entry:
Then select the Wifi network you want to connect to (GP24509022 in this example):

A popup dialog will show. Enter the Wifi password and press Join. You are now connected.

Apple macOS
In macOS select the Wifi symbol in the top toolbar. Then select the Wifi network (GP24509022 in this example):

A dialog will open where you can enter the Wifi password. Finish the connection by pressing the Join button:

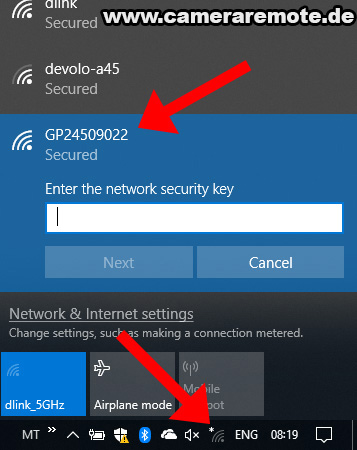
Microsoft Windows
Select the Wifi symbol in the Windows taskbar. Then select the Wifi network (GP24509022 in this example) and press Next.